


A lot of sellers refer to this as the HS30. Basically it's a cheap knock-off of the more expensive named airbrushes like Iwata and Badger. Of course it isn't going to last as long and probably isn't as well made but it cost me around £10 which I was more comfortable paying when I wasn't sure how much use I was going to get from it. In addition I picked up a cleaning station for a tenner that doubles up as a holder and allows me to blast through some cleaning solution in between colours whilst filtering some of the vapour that is generated.

I've watched rather a lot of videos on YouTube about airbrushing including OrcPainterNerd, MarneusAugustusCalgar and Wargamers Consortium amongst others. Most recommend having a go on some paper first to practice the action and get the mix right. I had a bash with some thinned down Mephiston Red and sprayed some pretty patterns on some paper. Generally I wanted an idea of how the spray pattern changed depending on proximity of the airbrush to the surface and how far you need to pull back the trigger to get a good flow. I'm led to believe that better airbrushes have smoother actions and more control but to me my cheap little brush seemed pretty good.
After that first session I took the airbrush apart to clean it. I know you don't really need to but I wanted to see how it went together. A couple of bits were a bit tricky to re-assemble but generally it's a pretty simple construction so taking it apart once in a while for a good clean should be do-able.

I've had a rhino lying around for a while now that was originally assigned to my Space Wolves but when 6th edition pushed people away from mech I tossed it in the direction of my Dark Angels for the odd occasion I might want to run a rhino with my bikes. You may remember that I've been painting my Dark Angels up in a similar scheme to the Angels of Redemption. You can see my test model below and I must confess I haven't painted many more models since him. I do have a couple of bike squads up to table-top standard but my motivation to paint them waned when I quickly got bored of the new DA codex.

Nevertheless it was a good excuse to give the airbrush a go on a nice big model first and also an opportunity to try masking and seeing how well that works. The rhino was already sprayed with Chaos Black so this would be a good test of how well the airbrush could cover with lighter colours. To start with I sprayed one half of the model with Caliban Green (incidentally I'm using Vallejo Airbrush Thinner to "water" down). I then added some Warpstone Glow to the mix and tried to spray a thinner coat in attempt to shade. I think I probably got a bit carried away though so the shading is kind of lost.

After that I left it to dry for a bit. Not sure this was necessary mind you as I think it was dry by the time I'd washed out the brush. I then used some conventional masking tape (B&Q's finest) to mark a line down the centre of the tank. I toyed with the idea of taping some newspaper over the green bit to avoid overspray but I wanted to test out the accuracy of the airbrush so I decided not to bother.

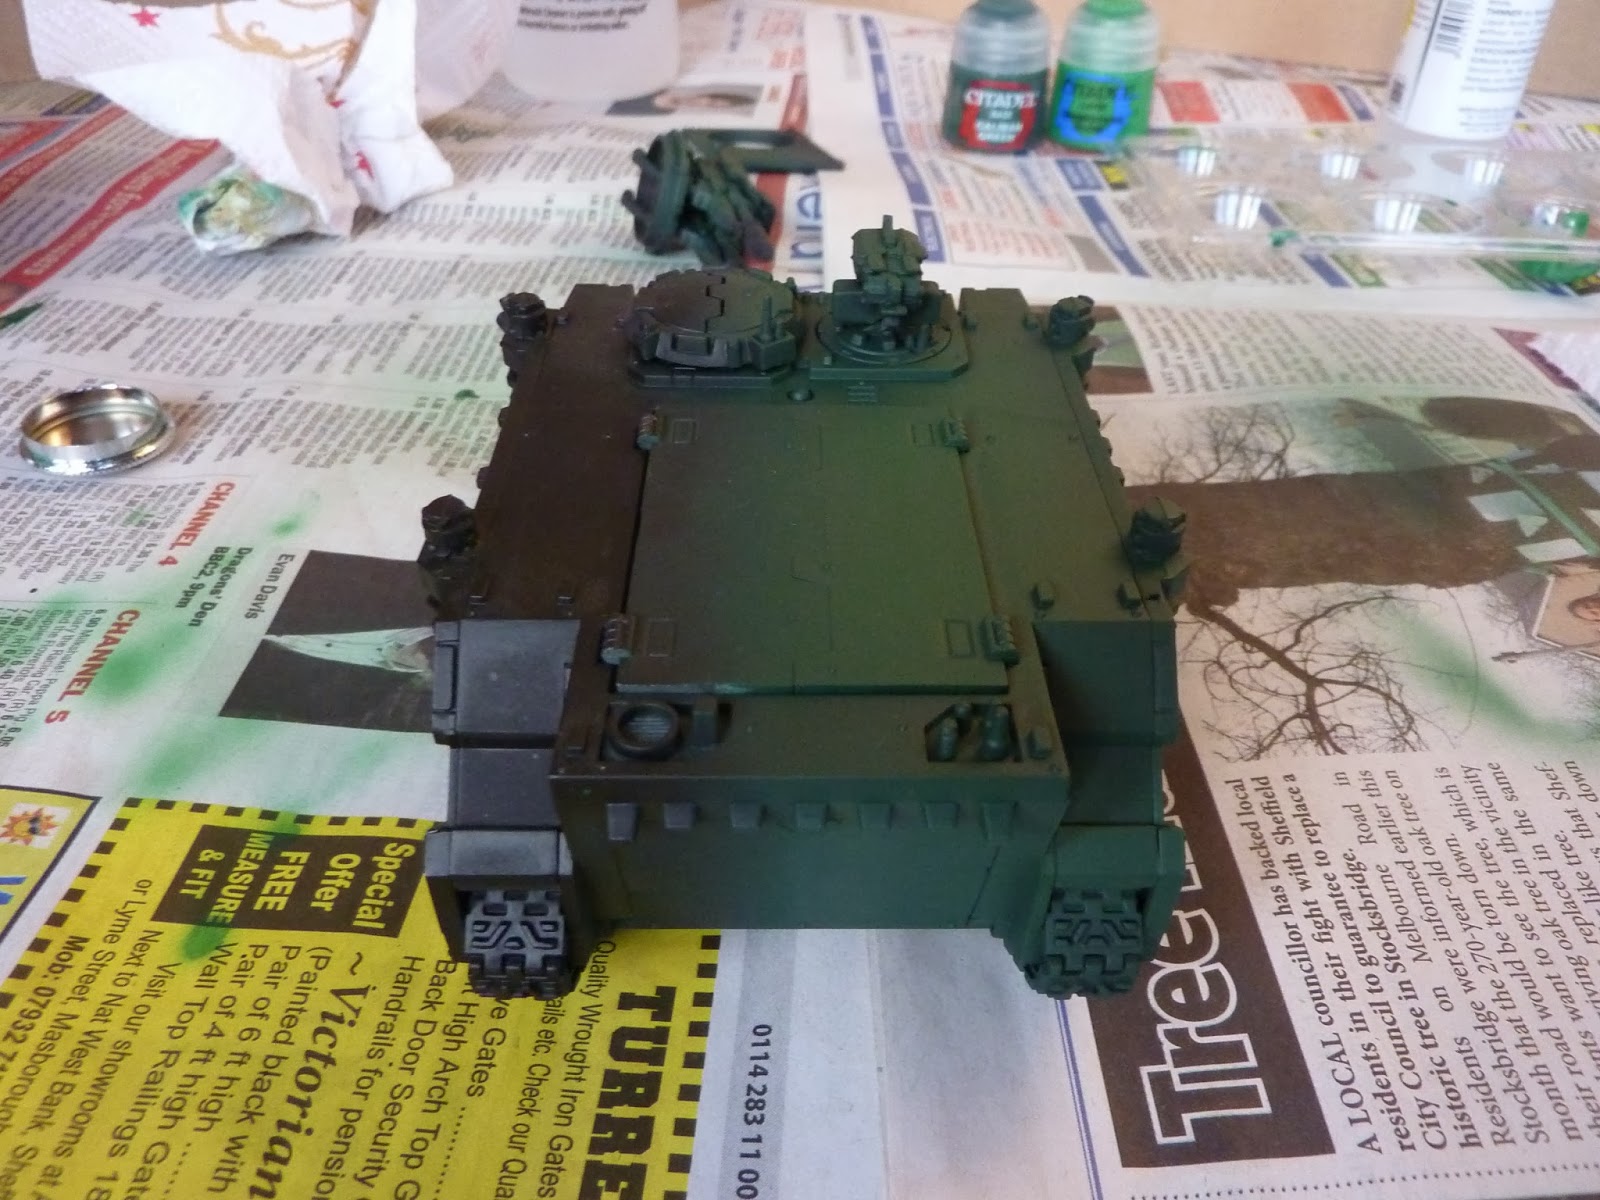
I sprayed a coat of Rakarth Flesh over the other half doing my best to get an even coat and get into all the nooks and crannies. Once the tape was removed the "final" finish was revealed. I use the inverted commas because it's actually barely started. I want to spray on some chapter heraldry and then go to work with a regular brush to add details. I'll come back to the airbrush at the end though to add some weathering.

As you can see from the picture below I probably should've taken more care to smooth down the masking tape as there are small leaks where it wasn't down enough. Additionally I probably should've employed the newspaper idea as I've gone over the other side of the tape a bit. This is probably just me being overzealous rather than the brush being inaccurate. These will be pretty easy to touch up with a regular brush though and I'm happy with the finish and the time it took me to achieve it. There's no question that, even including setup/cleaning of the airbrush, it was much quicker than using a big brush. I'd have never gotten the finish as smooth either. Not bad for a first attempt I reckon.

Couple of things I've learnt so far. Firstly it's a good idea to mix more paint than you'd think. It's annoying to have to mix more when you're in the middle of a colour and you can always pop it back in the pot since it'll barely affect the mix. If you're worried I'm sure there's empty pots lying around that it could go in. Secondly an old brush seems to be the best tool for mixing the paints. I was trying to use the pipettes but they're too much of a faff and you end up losing half of your paint inside. The old brush is great for getting the paint into the airbrush cup too. Finally, it's a good idea to have plenty of kitchen roll to hand. Very useful for cleaning out the cup (I'm using Medea Airbrush Cleaner), test spraying before committing and generally avoiding mess.
Overall I'm pleased with my purchase. I know I've got nothing to compare it to but it's actually much better than I thought. Obviously I'm just doing block colours here so I'm not really testing myself too much. When I start to work on my Dark Eldar I'll be trying some fading and more intricate masking and stencil work. Anyway, I hope this stuff will be interesting and at least I'm getting some hobby content on here for a change! I'll post again once I've done the stencilled chapter logos etc.
If anyone is thinking of getting an airbrush feel free to ask questions in the comments and I'll either answer or point you in the direction of a good youtube video!
I can throw in some points that I've learnt using my airbrush:
ReplyDelete1. Vallejo Air Colour is very simple to use and well worth a look into.
2. Never use water as a thinning agent. Get some proper airbrush thinner. The water becomes a nightmare if you thin it too much.
3. Always wash your airbrush out after each colour in order to avoid clogs.
4. Pre shading is a skill that cannot be under appreciated. For instance, if I was painting Red onto my wave serpent, I would do this:
Step 1: Grey Priming.
Step 2: 50/50 Grey/Black mix towards recesses.
Step 3: Black in the extreme recesses.
Step 4: 50/50 Grey/White mix towards the "highlights."
Step 5: Pure white on what I want to be the brightest colour.
Step 6: Blanket coverage of red - all of the shading is already done. You can then apply a wash of Nuln oil, or similar, to the extreme recesses if you want the black line look.
Alternatively, you can just go Grey/Black/White, or even Grey to Black. However, putting that extra effort into the pre shading is worth it. Means you only need Black, White and Red in order to do the whole thing.
I urge you to give it a go.
Ive just done a bunch of vids on a Land raider I painted going over masking, weathering details etc.. they might help..
ReplyDeleteI'm also happy to answer any questions you might have..
you do however need to prepare your wallet, cos i give you a year at the outside before you want a batter airbrush :)
Airbrushing is definitely a game changer. It makes some things so easy, it feels like cheating. There's no going back. ABSOLUTELY agree with crazy about the pre-shading. it will take your vehicle work to another level. check out "BUY PAINTED" on youtube for a great pre-shading tutorial video.
ReplyDeleteYou guys beat me to it. Here's Buypainted's preshading tutorial:
ReplyDeletehttps://www.youtube.com/watch?v=Od2XYnhVCq0
Those little cheap Chinese airbrushes are actually just fine. Welcome to the future. You're gonna like it.