Showing posts with label Chaos. Show all posts

Tuesday, August 11, 2015

Bringing Back the Fun

Matt and I have managed to get a couple of games in over Summer since he's on his six week holidays from teaching (git). We played a game with his Necrons against my DE in a Fluffageddon test game and basically called it on Turn 2. It was totally miserable. I know no-one enjoys losing but seriously it just felt impossible. Obviously the Fluffageddon rules don't exactly help DE but still, it was probably a low point in our 40K gaming. We decided that for our next session we'd do something we hadn't before and actually discuss our armies with each other in advance. Normally we're practicing for a tournament or testing things out for Blog Wars but since I've not changed much for BWX and we aren't booked into any tournaments we could actually have some friendly games.

We decided to play a classic matchup of Tau versus Blood Angels (we played this a lot when we got back into 40K in 2009) and then a game of CSM vs Space Wolves. We were deliberately toning our lists down from the usual tournament standard and taking units we wouldn't normally use and conversely dropping some we normally would. That resulted in some classic looking lists. My Tau were pretty mech heavy with a few suits and the SW army consisted of Grey Hunters in Rhinos and Terminators in a Land Raider!

Well, you know what? Those were two of the best games of 40K we've had in a long time! The BA vs. Tau game swung dramatically as ever with Tau cutting down swathes of marines early on and the BA hitting back hard in combat. I was screwed a bit by the tactical objectives I pulled out (we used the BW ones) but basically I had all my luck early on and Matt's came in towards the end when it mattered. Dante was a beast and he got lucky staying locked in combat with my Fire Warriors who pulled out some Insane Heroism (double ones). I tried to kill the BA off quicker than they could get to the Tau in combat but it wasn't to be. You forget how fast jump infantry can move!

The SW vs. CSM game was almost 5th edition in appearance with both of us having three rhinos and a land raider. I had thunderlord and Matt had some obliterators to prevent them being identical. Early on it was a case of brinkmanship with neither of us wanting to dismount from the rhinos too soon. I actually popped smoke on a vehicle for the first time in ages! Anyway, eventually the rhinos started exploding (they're pretty tough these days) and we had men on the ground. There were some brutal combats and equally brutal psychic attacks from Ahriman and Typhus. It came down to just a handful of models. My land raider limped through on a single hull point to try and incinerate some thousand sons only to succumb to weapon virus and lose the final hullpoint! Typhus eventually won the combat against my Thunderlord (he needed help from the Chaos terminators!). When the dust settled we had a damaged rhino each but the only other survivors were Ulrik and a couple of Grey Hunters! Since we were playing Cleanse the Xenos (from Blog Wars) that gave me a narrow victory!

With the postponement of Fluffageddon we've decided to book a couple of tables at WHW and have our own mini-tournament on the same day. Matt will be bringing Chaos (I think, he keeps changing his mind), Jamie is thinking Dark Angels (or some shade of Space Marine), Scott is taking Tyranids and I'm going to take Tau. Since it worked so well for Matt and I we've decided to show each other our lists. I'll talk you through my Tau in the next post.

Monday, March 31, 2014

Battle Report: Space Wolves vs. Chaos on my New Alpine MegaMat

For those not aware of it, the MegaMat was a Kickstarter from TableWar and Frontline Gaming. I've been looking for something like this for a long time and both the designs and product quality were on the mark for me. The mat arrived a couple of weeks ago now. It comes in a carry bag but due to the width of the mat it wouldn't really be practical to transport around if you didn't have a car. Great for me though as when I want to switch back to using my home-made realm of battle board I can simple roll up the mat and lay out the tiles.

I'm impressed with the quality of the product. Up close the print is a little blurry but you really have to be studying it to notice. The mat instantly changed the look of my table without messing about trying to achieve the same results with my meagre skills and lack of free time. There were four different designs on offer (I think). I was tempted by the Urban one which cleverly incorporates the deployment zones with roads for the straight ones and flares for the diagonals. However, I've mentioned before that I wanted a snow/ice themed board so the Alpine mat was always going to be my favourite. Hopefully owning the mat will encourage me to work on some snowy scenery to go with it. I've already started painting some up but I've got to do some research and experiments with creating the right snowy look. Apparently the mat is waterproof but I have to say I didn't dare test it! The other nice thing about it is how dice sound when rolled on it. I know that seems ridiculous but there genuinely is something pleasing about the sound it makes!

Anyway, Matt and I had a game on it a couple of weeks back with me trying out DE with beasts and Matt running an interesting marines list with centurions. Unfortunately, I've struggled to find the time to write it up and I've not forgotten most of the details. Luckily, we've since had another game on the board and if anything Space Wolves are a better fit for a snowy scene. We'd be playing the Control Freak mission from Blog Wars as a bit of a test of the scenario.

I was running a mech heavy list as a bit of a throw back to 5th edition. My list featured Logan and some terminators in a land raider, Arjac with some grey hunters in a drop pod, two rhinos with grey hunters, a lone wolf, a vindicator and a dakka predator. Matt was running a Crimson Slaughter army with a lord on a bike with a unit of possessed, Kharn with more possessed in a land raider, a defiler, two units of plaguebearers and a bloodthirster. It's been a long time since we've run lists like this and it's amazing how few models you get when you've got land raiders and expensive characters.

Matt won the roll off and elected to go first. He could only a strip a hull point from the vindicator and immobilise one of my rhinos. No first blood for him then. The bloodthirster had deployed a portalglyph though so I spied a chance for an easy first blood for me (I'd forgotten that this mission doesn't actually use First Blood as a secondary - you'd think I'd remember since I wrote it!) and stopped any more daemons appearing. I'd also dropped Arjac in to try and take out Kharn's land raider but he missed with his hammer and despite hitting the meltagunner in his squad couldn't penetrate the armour scoring 13. Logan and his terminators lined up to bring down the bloodthirster and then hopefully engage it in combat with help from the lone wolf. Sadly the combined shooting of the land raider and the terminators didn't score a single hit so the daemon stayed aloft. The nearby grey hunters faired better though, with help from the vindicator they were able to kill off more than half of the possessed squad and wound the lord. With two of the objectives in my hands and one contested I was off to a good start, 2-0 at the end of turn 1.

The defiler killed off a swathe of grey hunters with its battle cannon but failed to charge into combat (Matt forgot it has Fleet). The plaguebearers nearby decided to charge in but were wiped out with help from daemonic instability. The lord and his possessed charged the grey hunters but with counter-attack and the extra attack from Logan the wolves killed off the remaining possessed. Sadly, the wolf guard couldn't kill the lord with his power fist which would prove costly. Kharn and his possessed sprang from their land raider and piled into combat with Logan (Kharn took a wound on the way in as his pistol got hot!). Meanwhile the land raider fired its lascannons at the lone wolf who failed both of his storm shield saves. Logan ended up in a challenge with the champion preventing him from getting at Kharn who chewed through all four terminators with gorechild!! Logan easily dispatched the champion so there'd be no hiding for Kharn next turn. The bloodthirster smashed into the land raider and easily tore it apart.

Arjac and his meltagunner pack mate were able to destroy the defiler although I'd been hoping the other squad might destroy it to free up Arjac for another shot at the land raider. The vindicator and predator combined to banish all but one of the newly arrived plaguebearers back to the warp. The lord was now in combat with the grey hunters on his own but with T6 and 2+ save he wasn't going anywhere unless the wulfen could rend. I'm normally pretty jammy when rolling for the wulfen's attacks but not this time as I rolled pretty low every combat. Logan had opted use the Axe Morkai as a power fist so Kharn would be striking first but would almost certainly be killed if he couldn't down the great wolf. Sadly, he wounded 5 times and Logan failed four of his 4++ belt saves and the great wolf was slain.

Fearing reprisal from the vindicator kharn and his remaining possessed jumped back into their land raider which turn its attention to the predator and ripped through it with lascannon fire. Meanwhile the bloodthirster swept across Arjac's unit who took less casualties from the vector strike than Matt was hoping as Arjac made his saves. The obliterator arrived from deep strike and scattered on top of the vindicator causing him to be misplaced but he'd still be able to get into the fight next turn. The remaining plaguebearer moved onto the central objective at this point the score was something like 4-2.

With the bloodthirster contesting the objective Arjac needed to deal with it. The nearby grey hunters were able to bring it down and with help from Arjac's squad they were able to bring it down to a single wound to give Arjac the best possible chance. The bloodthirster challenged Arjac to prevent him using the grey hunters as ablative wounds. Grimnar's champion managed to survive with a single wound but despite 3+ to hit with a re-roll he only scored two hits from his 5 attacks (my re-roll scored three 1s). One of the two hits failed to wound and the bloodthirster passed his invulnerable save. Arjac may have missed his chance. Meanwhile the drop pod and one of the rhinos fired their storm bolters and killed off the single plaguebearer. The lord finally finished off the wulfen who'd failed on multiple attempts to rend whilst the lord kept using IWND to get back to full wounds.

Kharn and his possessed again charged from the land raider, this time into the grey hunters from the immobilised rhino. Kharn killed off the wolf guard in a challenge but unfortunately for him all of the possessed died around him so in the next phase he was finished off by the grey hunters after fluffing his attacks. The bloodthirster managed to cause three wounds on Arjac who was fortunate to pass all of his shield saves. Yet again though he failed to bypass the daemon's invulnerable save which stopped three hits this time! The next round was different though, Arjac again passed his saves (jammy I know) but this time his hammer hit home and just managed to cause a single wound (Matt was pretty jammy with his saves again) and slay the beast.

Matt was now left with just the obliterator and the biker lord. The obliterator was struggling with range and with the fact that I kept using a rhino to block the vindicator. Luckily for him though the vindicator missed it's mark when it tried to strike him down. The biker lord was forced to finish the job with his power fist but all the while I was scoring points on the left hand objective. Arjac made his way into the middle and charged in on the land raider, smashing his hammer through its thick plate and causing a devastating explosion. This attracted the attention of the biker lord who struck him down with his fist, only taking a single wound in return.

It was too little too late though and the game ended on turn 6 (this mission is limited to five turns but I forgot again!). It ended with a 10-4 victory to me but it felt a lot closer than that.

Conclusion
Once again Arjac Rockfist demonstrates why I love him so much and why it always amazes me that he gets overlooked so much. I can understand that there wasn't a model for a while but the WG terminators kit always offered an easy conversion and now there's a genuine model. Of course with two wounds he's prone to a premature death from time to time but if you can roll those 2+/3++ saves you're golden. Being able to re-roll against ICs and MCs is crucial (when it works) and Eternal Warrior makes him that bit more frustrating. Anyway, I'm sure there's a dozen posts about him on here so I'll shut up now.

Arjac finally meets his demise
This game could've been very different though. It would have been a lot easier for me if Kharn hadn't killed those terminators as with the extra attack from Logan, combined with Counter-Attack and Preferred Enemy would surely have resulted in the possessed being cut down. Similarly, Kharn was fairly lucky (but not overly so) to kill off Logan before he struck back. If Logan had at least one wound left he'd have massacred Kharn with his axe on power fist mode and then wiped out the possessed in the following round with his axe on frost blade mode making the most of I5. Once out of that combat he'd have been a real thorn in Chaos' side.

On the flip side, the game could've been very different for Matt if he'd been able to charge with his defiler. It didn't help that he forgot about Fleet but even so not getting into combat with Arjac and then subsequently not killing many with the vector strike from the bloodthirster really messed up Matt's plans. Having said that though I really should've been able to kill the defiler or land raider in the first turn.

Anyway, more importantly it was another opportunity to test out the mission. I have to say I'm a huge fan of it and I hope the players at Blog Wars 7 like it too. Given that tabling isn't an option you literally have no choice but to try to get on the objectives early and stay there. Obviously speedy armies are at an advantage here but they tend to be either flimsy (DE) or have a low model count (Ravenwing). Of course it isn't perfect, going first gives an advantage if you can get on the objectives without response but then you've commited early and might regret it later. It forces players to think differently about their tactics and that, to me at least, can never be a bad thing. Hopefully Emperor's Relic will have the same effect and encourage bloody skirmishes in the middle of the board.

Something I want to finish on (sorry I know this has been a long post already) is that this game was a hell of a lot of fun for both of us. This was probably mostly due to it being a 5th edition style game with me running a mech list from a 5th edition codex and Matt resisting the temptation to bring a Heldrake (which would've undoubtedly swung the game in Matt's favour). I'm keen to try more games in this style where there aren't tons of flyers and there are more vehicles around.

Tuesday, February 11, 2014

Stunning Nurgle Daemon Army

Just a quick one today folks. You might remember a week or so ago I posted up a doubles battle report between Jamie, Dan, Matt and I. Well, Dan (who Jamie refers to as "Old Two Eyes") has been hard at work on his Nurgle army for a while now. As Jamie says, Dan is a perfectionist when it comes to the hobby. I'm pretty happy to field an army with basic three colours just to get them on the table but Dan isn't content until every model looks stunning. Here's an example from his now "finished" Nurgle army.


I use the inverted commas because we all know there's always room for growth in any 40K army and indeed Dan is planning on adding some Chaos Space Marines to the Nurgle pus party! An army like this makes me incredibly jealous. I wish I had the skill to produce something this stunning that I'd be proud to field on the table top. Anyway, you should head over to Jamie's blog, Codex Imperialis for the full showcase.

Thursday, January 23, 2014

Cypher for sale!

I'd be surprised if it escaped your notice that GW released the rules for Cypher as the end of their Digital Editions advent calendar. Suffice to say, Jamie (Index Astartes) was pretty excited about this. Games Workshop does of course make a model for him but as ever Jamie decided to convert up his own version. Well three actually! He's then painted them up to a very high standard (far better than I could). He'll be keeping one for himself and Matt is taking another. I was offered the third but since I'm trying to save money at the moment I passed up on the opportunity.

That means the third model has gone up for sale on eBay. You can find him here and bid away. There's just over 3 days left on the auction. Suffice to say the photos don't really do the model justice, I know whoever wins it won't be disappointed. Anyway, head over to Jamie's blog to read more about the conversions and their paint job.

Friday, May 31, 2013

Battle Report - Blog Wars Warm-up - Tau vs. CSM/Daemons & Tau vs. GK

Matt and I have been working on our Blog Wars 5 lists (tickets still available from the link on the right) for a while now. I've switched from DE to DA to Tau and Matt has been trying to find a CSM/Daemons list that he's happy with. Today was another test game for us. Matt would be trying out a new Chaos list followed by a Grey Knights alternative and I'd be using my "backup" Tau list that requires less painting than my planned list. Oh and it's cheaper too as I don't need to buy any broadsides. Here's what I'm running:

1,850 pts of Tau
Commander (fusion, plasma, TL, VRT, iridium)
Ethereal

12 Fire Warriors w/ Devilfish (d.pod)
12 Fire Warriors
12 Fire Warriors
11 Kroot plus hound
11 Kroot plus hound

3 Crisis Shas'ui (twin-linked fusion, plasma)
2 Crisis Shas'ui (MP, twin-linked MP), Shas'vre (2 pods, PEN)
Riptide (ion, fusion, EWO, VT)

7 Pathfinders
7 Pathfinders
Sun Shark (twin-linked MP, decoys)

Hammerhead (Longstrike, subs, SMS, spines, d.pod)

I'll run down how the list works in another post but I'm pretty sure you can imagine. Anyway, onto the battle reports.

Game One - Tau vs. CSM/Daemons
Matt was running 2 princes, lord of change, pink horrors, typhus, 2 x 10 zombies, 2 heldrakes, 3 solo obliterators. We were playing Relic on Vanguard. I won the first turn and there was no Night Fighting.

With the daemon princes fearing S10 insta-death they were safely behind a building. Therefore I brought as much fire to bear as I could on the lord of change whilst he wasn't swooping. I managed to bring him down to two wounds and kill off  handful of horrors and zombies. Matt moved his daemon princes forwards as quickly as possible with one taking cover behind a building. The other deployed the portalglyph which spawned some horrors which used their bolt to kill a line of 4 fire warriors. The other horrrors attempted to kill some pathfinders but they passed their Deny the Witch roll. The lord of change incinerated 4 of the other pathfinders though.

I got all four of my reserves with the kroot squads arriving on my left flank to gun down some zombies. The suits dropped into the centre and the flyer dropped its drones before targeting one of the daemon princes. Sadly it failed to harm the prince despite grounding it. The spawned horrors weren't around long as the disembarked drones from the devilfish killed them. The lord of change was cut down by massed firepower after being downed. Longstrike turned his railgun's attention to the downed prince but depsite wounding the beast it passed its invulnerable save and avoided death. The recently landed crisis team was able to finish it off however whilst the commander closed the portalglyph down permanently with his fusion blaster.

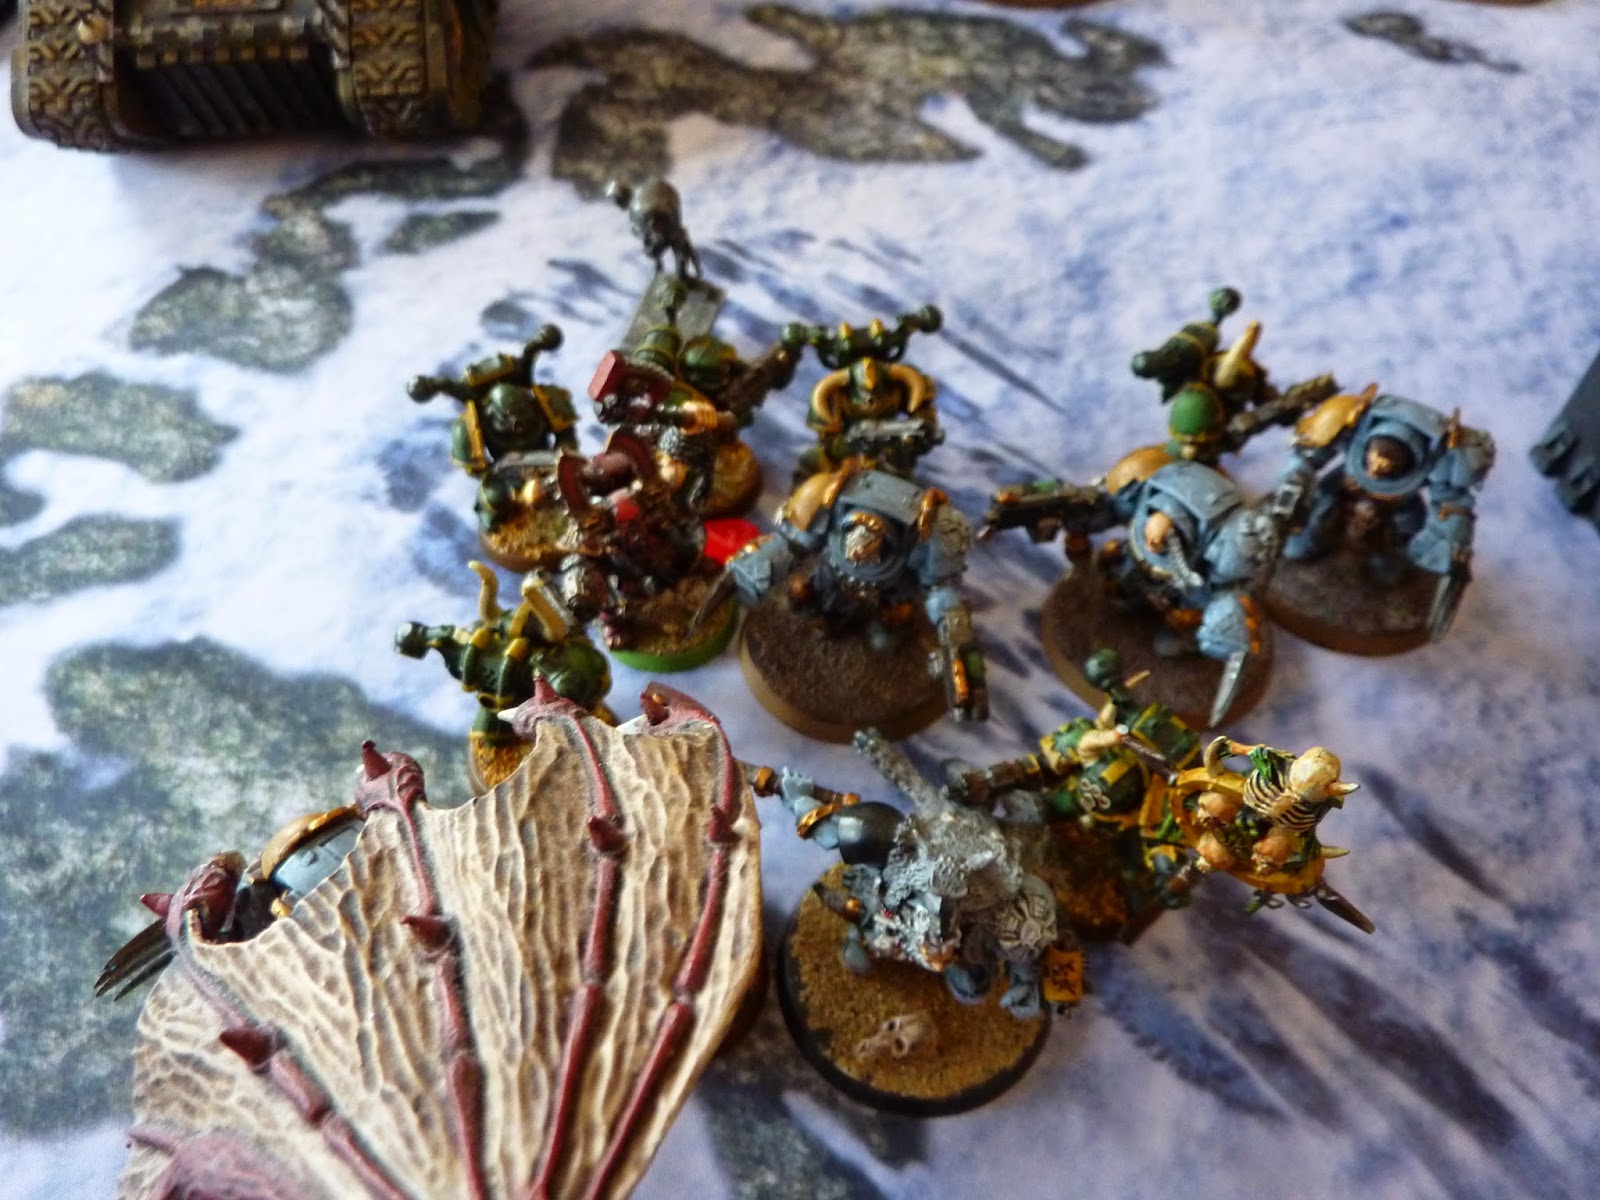
Not a pretty sight!!
Matt dropped two obliterators in brave positions next to Longstrike but could only strip two hull points and destroy the SMS with their twin-linked meltaguns much to Matt's annoyance. The daemon prince turned around and smashed down the entire crisis team including the commander for slay the warlord.

The fire warriors and riptide combined to easily remove the obliterators whilst the bomber dropped its payload on the zombies but could only kill a couple. Sadly despite heavy firepower the daemon prince survived thanks to tzeentch re-rolls of 1s on its armour save. Typhus arrived with another obliterator along with the pair of heldrakes. Never a nice sight! The dragons started by vector striking my bomber down with ease between them. They then incinerated the ethereal's squad but thanks to some good fortune the ethereal survived whilst his squad perished. The obliterator failed to hurt the hammerhead just like his late colleagues. The daemon prince dispatched the other crisis team as easily as he had the first.

The Tau hit back killing the daemon prince and destroying the baleflamer on one of the heldrakes. Sadly the other was unscathed though. The fire from the Tau gunline was enough to leave Typhus on a single wound. In return, the obliterator charged the hammerhead after failing to destroy it with his melta again. The power fist was enough though and the vehicle was wrecked. Typhus attempted to charge the riptide but with only a single wound remaining he was cut down. The horrors gunned down the pathfinders thanks to rolling well on their power.

One heldrake zoomed off to the left flank to deal with the kroot but only killed a handful. In return the kroot were incredibly lucky and stripped two hull points from the flyer. There was very little left on the table now and the game was coming to an end fast. Sadly I'd totally forgotten all about the objective. The kroot managed to kill one of the zombie squads but sadly the other was able to claim the objective. With Matt scoring slay the warlord too it was enough to give him a 4-2 win. With very little chaos left on the board this was probably against the run of play but as ever I need to play the mission!! My riptide was all off half an inch from contesting though!

Game Two - Tau vs. Grey Knights
Matt was running 3 (yes 3) dreadknights, coteaz, a 10-man strike squad, a stormraven, draigo and 4 solo paladins. Certainly not a horde then! We'd be playing Big Guns on Dawn of War and once again I was lucky enough to take first turn and there'd be no Night Fighting.

Basically I wanted to try and put as many wounds on the dreadknights as I could. The crisis team used a couple of markerlights to become BS5 and with Monster Hunter from the chip they were able to force the dreadknight in the centre to take 8 saves. Somehow Matt managed to roll four 1s and I'd killed a dreadknight in a single volley!! Draigo was at the front of the strike squad. With Coteaz acting as a Look Out Sir tank for any S5 or less shots. The riptide and hammerhead managed to put a couple of wounds on draigo and kill a couple of strike marines. To do as much damage as I could I fired some 30" pulse rifle shots from my fire warriors at BS5 (thanks markerlights). They managed to score 8 wounds with Matt rolling LoS for half. He then had 4 2+ saves on Draigo who somehow died too!! That has to be one of my best openings ever, Draigo and a dreadknight down at long range!!

From this point onward Matt was fixated on the number of 1s he was rolling. I'm not suprised! Anyway, the remaining dreadknights advanced and incinerated both pathfinder teams with the remnants running off. No more markers for me but I could hardly complain. The strike squad cut down 6 fire warriors too.

My crisis team, bomber and one squad of kroot arrived. The kroot, interceptor drones and crisis suits lined up the dreadknight on the left whilst the crisis team dropped in next to the other. The commander and his team were easily able to destroy their target but the other dreadknight survived with a couple of wounds. Matt brought in a couple of paladins but despite attempting to intercept them with the dreadknight I'd failed to Nova him so a single melta shot ended up not being enough. The ion accelerator was able to remove a wound from one though. The stormraven arrived and failed to harm the hammerhead with it's multi-melta but it did manage to kill a crisis suit. The dreadknight managed to stay locked with the crisis team to save it for a turn.

One paladin was finished off by the fire warriors but the other survived on a single wound. I managed little else but was able to block the paladin with my gun drones and use the devilfish to prevent the dreadknight from charging my riptide once he was out of combat. The dreadknight now finished off the crisis team as expected. This cock-blocking prevented the paladin from charging my fire warriors and instead he headed towards the kroot. The dreadknight incinerated some fire warriors and then found himself out of charge range. The paladin had similar problems. The stormraven decided to hover for another shot at the hammerhead but despite hitting this time Matt snake-eyed the penetration rolls (more 1s!!).

Longstrike failed to down the storm raven as it passed it's Jink save! The crisis team did the job on the now hovering flyer and blew it out of the sky. I failed to kill the paladin and dreadknight who were now passing their 2+ saves with ease. A third paladin arrived and managed to lose a wound to dangerous terrain (1 followed by a 1). The riptide then intercepted to take it's remaining wound!! The paladin charged the kroot forcing them to run. The dreadknight incinerated the rest of the ethereal's squad and charged him down too. Despite my early luck this was now looking a lot closer that it seemed. Luckily I managed to kill the paladin with my gun drones before the interceptor drones dispatched the dreadknight. God I love killing things with drones!! The flyer zipped off hoping to return should there be a turn 6.

If I hide behind my shield he won't see me!
Matt wasn't done yet though. A final paladin arrived and controlled the kroot objective. Meanwhile the strike squad lined up to charge the other kroot as Coteaz split off to try and kill some fire warriors. He killed enough to put them out of range of the objective. The strike squad failed the charge luckily for me. I'd got an objective with my hammerhead, Matt had one with his paladin with the other contested.  If the game ended on turn 5 it would've been a draw as we'd both got 2 secondary VPs. With Matt rolling so many 1s (and having rolled for it game 1) I rolled and got a turn 6.

I tried to play for the tabling now. A pair of fire warriors had jetted over to the paladins objective in a devilfish and with help from the kroot they killed off the paladin controlling it. The kroot opened up on the strike squad killing the remaining two marines. I just needed to kill Coteaz for the tabling. The riptide hit him with an ion shot but Matt went to ground. He failed his initial 6+ but thanks to Precognition he passed the re-roll and with the game ending there I'd just missed out on the tabling.

After Action Thoughts
Well the first game was yet another lesson in play the mission. Had we played on for another turn then it would've been an easy Tau win but I need to remember to play for turn 5. Otherwise the game felt fairly one-sided. Having said that Longstrike didn't do what he has in previous games and instant kill any daemon princes. In fact in both games he was pretty unlucky. I missed with him several times despite BS5 and when I did hit things made their saves. I still think he's worth having though as he should do a lot better.

For the entire first game I forgot all about my interceptor units. The riptide really should've been dropping those obliterators and maybe even heldrakes before they even struck. It was a pretty major mistake and I was just lucky that Matt wasn't able to punish me for it. Still, I've not been using Tau long I suppose.

The second game I've dubbed "A Game of Ones" and Matthew of Greenwood (probably not the "first of his name") really didn't enjoy it. Once you've decided you're rolling a lot of 1s you do notice them more but seriously he was rolling wayyyy more than he should've been. I mean the obliterator wounding itself on dangerous terrain and the stormraven's snake-eyes with it's melta. That being said it's always going to be the way in massed fire versus elite army games. The sheer volume of shots is usually enough to deal with 2+ saves without low AP.

The riptide is really growing on me. I was sceptical at first but I think with interceptor and skyfire he's pretty awesome. I wasn't sure about the velocity tracker but the potential to fire two twin-linked melta shots at a flyer before it's even fired is far too tempting. Still he did manage to cause 5 wounds on himself across the 2 games thanks to failing Nova!

These games were great for me as they allowed me to test out my crisis team substitute for HYMP broadsides. I don't really want to buy 3 of the new models so I thought I'd try the team listed above. They certainly don't have the firepower of the broadsides and are only 3+ armour but they make up for it in manoeuvrability. This helps to compensate for the 36" range. With the puretide chip they're pretty good for dealing with vehicles and MCs alike. The main thing they lack is Interceptor though. The riptide and interceptor drones provide some help but it would be nice to have all those shots against Necron flyers for example.

Ultimately there isn't a world of difference between the two when you take everything into account. The main thing is that I don't have to buy, build and paint three broadsides if I take the crisis team. That means I only have pathfinders to paint and leaves me some money spare for Eldar perhaps.....

Friday, February 01, 2013

Battle Brothers Game 5 - Titanic Fenrisians vs. CSM/Daemons

We were convinced our final game would involve a lot of flyers but to our pleasant surprise we were met by Siap and Onno from the Netherlands who's Pus'R'us list was a beautifully themed nurgle army. Siap asked me to say this was our toughest, most challenging game but I'll let you decide! Here's what they were taking (from their list):

Typhus
Possessed
2x 5 Plaguemarines

Epidemius
5 Beasts of Nurgle
20 plaguebearers
9 nurglings

The central idea behind this list is that Epidemius is constantly keeping count of the casualties to feed his Tally of Pestilence. This gradually makes the army better and better the more kills they get.

Battle Report
This time we'd be playing Big Guns Never Tire (4 objectives) on Dawn of War which would make our dreadknights scoring! Everything in their army was high toughness though so there was potential both getting bogged down in combat pretty easily. We'd placed our objectives on opposite flanks to try and split up the daemons as they came in.

Siap and Onno got first turn, Epidemius arrived by deep strike surrounded by plaguebearers and the rest of the army moved up to meet us in the middle. This allowed us to avoid using a teleport from one of the dreadknights and get into combat with Typhus straight away. We hoped to be able to beat him in a challenge and quickly take both First Blood and Slay the Warlord. Once again though the dice weren't in our favour. Despite getting three wounds through Onno managed to pass all 3 on 5+ and then managed to make the dreadknight flee the combat with a single wound remaining. Elsewhere the drop pod came down and the grey hunters were able to kill 3 plague marines. The thunderwolves advanced up the centre hoping to react to any Daemons coming down.

The nurglings dropped in near to the drop pod grey hunters whilst the beasts came down in our deployment zone between our two objectives. The two remaining plague marines tried to take shots at the grey hunters but could only kill one. The other plague marines fired shots at the dreadknight but failed to wound. In return the dreadknight charged into combat and was able to cut them down. The thunderwolves charged into combat with the nurglings hoping to stay there for most of the game and slowly finish them off. With the nurglings needing 6s to wound they'd be fairly safe. Meanwhile the drop pod hunters gunned down one of the plague marines and charged in to kill the other earning First Blood (this actually happened before the dreadknight combat but made sense to describe them this way).

Second time lucky!
Typhus and his possessed advanced towards the purifiers and engaged them in combat managing to cut down a couple of the grey knights elite. The beasts charged into some acotyles and easily wiped them out. The formerly fleeing dreadknight had another go at Typhus and this time was successful earning us Slay the Warlord. The remaining possessed eventually succumbed to the purifiers. This left the beasts, handful of remaining nurglings and Epidemius with his horde of plaguebearers.

The purifiers turned their attention to the beasts and were able to finish them off after a couple of rounds of combat. We realised we needed to try and gain as many points as possible from this game to help our standings. To this end we moved the drop pod hunters into their deployment zone whilst still controlling an objective. The wounded dreadknight used his shunt move to hold another and we'd got acolytes on our objectives. The thunderwolves managed to kill off the nurglings which allowed us to turn our full attention on Epidemius. The wolf priest finally arrived with his grey hunters and shot into the plaguebearers cutting a few down. The other dreadknight charged into combat with him but Epidemius refused the challenge as "he was too busy counting, come back later". Dark Excommunication allowed us to take away the plague knives and meant the dreadknight could slowly pick away at the remaining plaguebearers.
I'm busy counting, come back later

Eventually Epidemius had no choice but to engage the dreadknight but by this point he'd also got the thunderwolves and wolf priest with grey hunters to contend with! He challenged the Wolf Priest who refused and let the dreadknight kill off the daemon, sealing the game 15-0.

Conclusion
Siap and Onno were brilliant to play and kept us laughing throughout the game with attempts to convert us to Nurgle and shake our faith in the Emperor. From the sounds of it they'd had a pretty miserable visit to the UK thanks to meeting plenty of flyer armies. They were actually pleased to see we didn't have any until they saw what we did have.

With the exception of the original round of Typhus saves were were pretty lucky in contrast to Siap and Onno's bad luck. Their list was an interesting mechanic and it was refreshing not to play Flamers, Screamers or Heldrakes!

Overkill
All told we'd had a pretty successful and enjoyable weekend. Finishing 20th out of 119 teams is pretty decent, especially with the scoring system. Most importantly we've had an infinite improvement in our favourite game tally with Sean from gaming two voting for us! Apologies to our opponents if I've got details of these battle reports wrong.

It was interesting to see that our list could still perform even with the ever increasing number of flyers around. Having said that the only time we met them in great numbers was the game we lost! There seemed to be a general theme amongst the players we met that they either loved or hated flyers and therefore took them or just ignored them.

We've already booked onto the April Battle Brothers so hopefully we'll see some of you there. Before then we've got Target Sighted at the Outpost in Sheffield which is a 1,500pt singles. Matt, Jamie and I are all heading down so it should be a laugh. Stay tuned for the best painted stuff from the weekend and then some details of a little thing called Blog Wars 5!

Wednesday, January 30, 2013

Battle Brothers Game 3 - Titanic Fenrisians vs. Daemons/CSM

Middle of Turn 1
Another thing we were hoping to avoid that we hadn't seen much of around the room was big units of screamers and flamers. You can guess what Pyro and Pus had then can't you? Alex and James were running (again from memory/photos):

Chaos Lord with mark of Nurgle, fist, terminator armour.
2 lots of plague marines (i think one lot of 5 and one 7-8 man squad)
Havocs with autocannons and mark of nurgle
Predator with Las/Auto

Herald on a disc
9 flamers
7 screamers
2 squads of plaguebearers

This time we'd be playing Relic on Vanguard deployment. A lot of high toughness in there but the CSM half of the army wasn't too much of a threat to us at range. We'd struggle to kill units off very quickly and would probably end up victim to the screamers and flamers. We were relieved they'd restricted them to one squad of each though because of the Daemons being the allies. We didn't get first turn this time around and failed to Seize but it actually helped....

Battle Report
They deployed the havocs on top of a derelict bastion (I wish GW would stop giving our opponents these) with the plague marines in front and the predator off to their left. I elected to walk my wolf priest and his grey hunters this time to have as much shooting on the table as early as possible. We otherwise deployed in a similar manner to the previous games.

Bottom of Turn 1
They put the plaguebearers in their preferred wave and dropped one on the relic with the other not far away.  Their shooting was pretty ineffective but managed to wound the dreadknight. In retaliation we brought the drop pod in centrally (to allow us easy access to the objective) and went after the smaller plague marine squad killing 3 with rapid fire from both grey hunter packs. One dreadknight went after the plaguebearers on the relic without needing to shunt whilst the other went after the other plaguebearers in a similar fashion. We wanted them locked in combat in case the screamers/flamers arrived so were quite pleased when we didn't kill many plaguebearers despite ignoring FNP. They'd probably not last another turn though so we'd have cut their scoring units in half. We'd also secure First Blood in the process.

The screamers came down (but the flamers didn't) and luckily for us they scattered away from our army. This meant they were restricted in what they could use their sweep attacks on being forced to hit the grey hunters and not killing many. We hoped the lord would take the bait and charge the dreadknight. He'd be forced to challenge it and with S10 we hoped to insta-kill him and then stay locked with the plague marines/bearers and slowly cut them down. Sadly, in what was becoming a trend for Matt. The dreadknight in question wasn't the one with the sword. He still managed to get 2 wounds through meaning it'd be 5++ saves for the lord or instant death. He failed one and we were about to celebrate when, thanks to the 5 plague marines cheering him on the lord got a re-roll and passed it. This allowed him to easily kill off the dreadknight in return with his power fist. Gutted.

Mid Turn 2
Bit of a blow but all was not lost. With the greatsword the dreadknight wouldn't be so unlucky and by killing a couple of plague marines first we'd get rid of that irritating re-roll. Anyway, before all that the grey hunters were in combat with the plague marines, killing them over a couple of turns, and the thunderwolves swept round to charge the screamers. We were pretty sure we knew it would end badly for them but needed to hope we could at least thin them down about or else hold them in combat. We didn't want them zipping around sweeping us and killing marines in combat.

Whilst Matt was finishing off the lord easily this time the thunderwolves charged in. I forgot hammer of wrath (as I did every game except the last) but killed off 3 screamers nonetheless. In return Alex was incredibly unlucky. He only managed to get through 3 wounds despite S5. This meant I only lost a single wound thanks to my shield and I'd cut down their effectiveness significantly. The purifiers cut down the remaining plaguebearers and left Alex and James with very little. The flamers still hadn't arrived in turn 3 which meant that if we could clear the board they'd have nothing left and the flamers would never show up.

To do this we needed to kill the predator, remaining screamers and the havocs. We were pretty confident about the tank and the screamers but the havocs would be tricky to shift. They were stuck up on top of the derelict bastion. We could shoot them with the grey hunters and incinerate them with the dreadknight but we'd be unlikely to kill them. The dreadknight could charge the building too but with them on the ramparts S3 hits weren't likely to harm them much and frankly neither was the jump down.

We cut down the screamers with help from the grey hunters and the purifiers got rid of the predator easily enough. The other grey hunters failed to kill any havocs and the dreadknight only got two of them. The dreadknight charged the building but despite destroying it it wasn't an explosion. The havocs took no damage from the building's demise and passed their leadership test.

The flamers were guaranteed to arrive in turn 4 but Alex and James decided that they wouldn't change the course of the game much. Sure they'd kill a squad easily enough but then our entire remaining army would hopefully have enough shots and attacks to do them in and the acolytes were on the relic at this stage. For this reason they elected to concede giving us a 6-0 win as we'd secured all 3 secondary missions.

Conclusion
Had the flamers arrived sooner and the screamers come down more accurately this game could've been very different. As it was it wasn't really that close. We were unlucky to lose a dreadknight in combat challenge with the lord but they were equally unlucky with their screamers against the thunderwolves. This doesn't really change my opinion of either unit as they weren't taken in big enough numbers to cause the problems that they normally do. I think Alex and James played a good game and the scoreline doesn't reflect this at all. The only thing I'd have done differently I think would be to put the screamers and flamers in the preferred wave as you want them in quick to do as much damage as they can and keep us pinned back.

The plaguebearers coming in first actually worked to our advantage allowing us to lock the dreadknights in combat and take an easy First Blood in the second round of melee. Had they been coming down later on and contesting the relic and killing acolytes then things may have worked out differently.

We'd finished the day with a maximum number of VPs in our final game (well you could just about get more if you had a warlord trait with the bonus - but still). We therefore would be going into day 2 feeling much better than we had down after game 2. We were still concerned about facing more flyers though.....

Thursday, September 13, 2012

40K Doubles Sept 2012 - Battle Reports - Day Two

Game 4 - Titanic Fenrisians vs. Cool Club: The Inebriati (SM/IG)
Simon and Jon were our opponents for game 4. These guys had brought a combination of Guard and Salamanders with the ubiquitous Aegis Defence Line. Their list consisted of two drop pods with a tactical squad in one and sternguard joined by Vulkan in another (both with plenty of melta/flamer - as you'd expect). They were joined by an infantry platoon, Leman Russ and pair of vendettas. 

The mission was four objectives and standard Dawn of War (Pitched Battle in my mind) deployment. The sternguard drop pod was the first to fall and with the pile of meltas we were sure they'd take out one of the dreadknights. Luckily for us Matt had some disgusting luck with his invulnerable saves and the monstrous creature came out with two wounds remaining. Thanks to nightfighting the rest of the army was relatively unscathed. 

In what our opponents described as a very gutsy move we dropped the grey hunters' pod in behind the Leman Russ. Unlikely before against the vindicator, this time the combined firepower of plasma and bolter was enough to wreck the mighty tank. One dreadknight went straight for the guardsmen and incinerated the command squad. Thanks to some clever Look Out Sir manipulation the astropath survived but the company commander wasn't so lucky. The other dreadknight helped the thunderwolves out by flaming the sternguard. They'd deployed them in two layers so that only one combat squad could be charged but we hoped that the dreadknight could make a hole big enough to charge through. When this failed we opted to try and multi-charge with the thunderwolves. Sadly overwatch fire from the sternguard was enough to kill off the front thunderwolf so only one squad could be engaged. The thunderwolves again struggled in combat and eventually fell to a counter-charge from Vulkan who'd split off from his combat squad. 

The vendettas arrived and ganged up on the dreadknights to save the guardsmen and sternguard. Before the vendettas opened up with the lascannons the guardsmen on the ground fired their lasguns. Much to our amazement they wounded 5 times and Matt managed to roll a triple 1 leaving a previously healthy dreadknight with a single wound. This allowed one vendetta to fire at each dreadknight and easily finish them off with their lascannons. With the loss of the thunderwolves this was a heavy blow. We'd now rely on the purifiers and grey hunters to finish off the remaining troops but the vendettas would definitely survive the game. 

The grey hunters parked up their rhino and lined up for a Jaws attack which would hopefully kill off the heavy weapons teams and astropath. Our opponents got lucky and passed their Deny the Witch roll though! The grey hunters who'd killed the Leman Russ marched down the hill bolters blazing and helped kill off more guardsmen. Elsewhere Vulkan had to footslog it back towards his lines to try and save the guardsmen. 

The remaining drop pod hurtled out of the sky and the ensconced tactical squad fired at the rune priest's grey hunters thinning their numbers significantly. With a dwindling supply of figures we'd need some luck to pull something out of this game. The rune priest decided to split off from the grey hunters and go for a jaws attack on one of the combat squads but could only kill one marine. The hunters on the hill killed an infantry squad with bolter fire. The remaining grey hunters hopped the defence line and wiped out the platoon command squad in combat. With a combination of Prescience and a malediction (who's name I forget), they purifiers were able to gun down an entire combat squad. The rune priest sadly failed his charge though. 

In a single turn we'd managed to turn our fortunes around. One of the vendettas went after the hunters on the hill and the other went to drop off an infantry squad on one of our objectives whilst killing off some acolytes. The tactical combat squad went after the rune priest for a Slay the Warlord point. Thanks to a secret mission they needed to kill him in combat though and he was able to cut two of them down before he died. He'd lost a wound to Perils early on and failed the only save he had to make from the tactical squad. 

The hunters had now come in from the flank and gunned down the rest of the guardsmen before heading towards an objective. This ended up being contested by Vulkan however. The two remaining tactical marines held the other objective and went to ground behind the defence line as the purifiers fired. Matt managed to score 10 wounds so we felt sure they'd perish. Even with a malediction forcing re-rolls of successful saves the tactical marines passed all 20 their 2+ saves! As it stood we had no chance of winning but with a turn 6 this time we had chance to turn things around. A second volley from the purifiers whizzed across the field and this time the marines weren't so lucky. 

With an objective each it would come down to secondary mission points. We'd both got Linebreaker and Slay the Warlord so it came down to that gutsy Leman Russ kill for First Blood to win the game! Bollocks! We'd ended up on table bloody 2 again! 

It has to be said that Jon and Simon gave us one of the best games of 40K we've ever had. The whole thing was so dramatic with grey hunters making a pincer attack on the guardsmen, drop pods slamming in across the field and vendettas zipping around. Had their prayers to the Emperor (literally!) been more successful the game could easily have gone their way.

Game 5 - Titanic Fenrisians vs. Disco Inferno (CSM/CD)
Sure enough, despite taking a less competitive, unbalanced list we'd managed to end up on table 2 again. We  were pleasantly surprised however to find Rob and Matt waiting for us. We've played Rob before in a previous doubles tournament with a different partner. The game was a straight match up between our Bloody Wolves and their similar BA/SW combo. It lives in infamy in our minds as the game where Mephiston was destroyed by a grey hunter pack in a single round of combat thanks to rending wulfen attacks and power fist. Knowing these were decent guys who would still give us a fun game meant we'd managed to avoid the problem of top table asshattery despite ending up there!

Anyway, this game was certainly going to be a very different affair. Their list was a combination of Chaos Daemons and CSM supported by Daemon allies. This essentially meant a Bloodthirster, 3x3 flamers, 9 screamers, 10 CSM, a winged lash-prince, pink horrors, plaguebearers and fiends. There were simply tons of things for us to have to kill and despite having grey knights we didn't really have them in enough numbers to make the most of their anti-Daemon rules. The mission was the 6th equivalent of Capture and Control from 5th with a single objective each and diagonal deployment.

The drop pod grey hunters were our best hope of getting First Blood but with very little on the board we had to go for the winged Daemon Prince. Despite wounding plenty of times, including twice with the plasma gun, the prince emerged with a single remaining wound. The rest of our army stayed packed together to try and encourage our enemies to deep strike within range of the anti-reserve fire of Coteaz (I must learn the name of the rule). Unfortunately our opponents were too smart to take the bait and threw everything at the grey hunters. However, all that ended up being needed was the combination of lash and flamers which not only killed all the grey hunters but glanced the drop pod to death too!

This left us with a choice. Hold our ground on our objective or push out and try and clear their troops from theirs. We went with the second leaving the purifiers to guard our objective whilst the dreadknights, thunderwolves and rhino pushed forwards. We moved the thunderwolves into a nearby forest to try and get an unlikely but possible charge on the screamers. Sadly this meant triggering a mysterious terrain roll (at my suggestion) which gave us brainleaf fronds. Rather brilliantly this randomly determined that the S10 power first thunderwolf would be causing 4 automatic hits on his own squad!! You just knew it'd be him and not the other three. I was lucky enough to fail to wound with one of the hits but could only save one of them on the storm shield before the bearer and another thunderwolf died to friendly fire!! Hmmm great suggestion Alex, awesome.

The remaining thunderwolves and grey hunters (who lost their rhino to more flamers) were charged by the screamers and wiped out over a couple of turns. This left me with no further role in the game with my entire force destroyed. The dreadknights tried to thin out the fiends but both were eventually tarpitted by flamers/fiends/horrors. If they could kill them off in time they might be able to engage the CSM and contest their objective giving us a shred of hope. Sadly the screamers had other ideas and their S5 AP2 attacks were perfect for killing off the dreadknights.

Whilst all this was going on the purifiers were fighting their own battle against the two flying daemons. Two units of plaguebearers had failed to drop in on them with one being lost to the warp and the other being misplaced. Meanwhile managed to take the remaining wound off the daemon prince but the bloodthirster was closing fast. Coteaz passed his Prescience roll but failed the second power which allowed Overwatch at full BS and granted Counter Attack (both of which would've been useful). Still they managed to strip all but one wound from the bloodthirster. The inevitable charge saw the bloodthirster challenge Coteaz but the Knight of the Flame stepped up with his halberd. With his preferred enemy he should be able to at least hit the daemon but even with double Hammerhand he failed to wound meaning he was easily killed by the greater daemon. Coteaz then refused the second challenge. The final purifier also failed to wound the daemon and Coteaz was now alone and easily killed off. 

All that was left for our opponents to do was kill off a few acolytes with flamers. The acolytes put up a brave fight mananging to draw the first round of combat but the end was inevitable. We managed to pick up a single secret mission point though and a point each for killing the Daemon Prince and Herald. It was a shame to end on the loss we'd been searching for all weekend but we were happy to have lost to Rob and Matt. Their list was brilliantly thought out and devastatingly well played.

Conclusion
Daemons are pretty damn good right now. Flamers got a lot better and their reduced save doesn't really compensate. The combination with lash is still very effective. It's a shame our rune priest was narrowly out of range to attempt to cancel it but I doubt the grey hunters would've survived anyway. Screamers are ridiculously good for their points and put out a disgusting number of attacks. With two wounds their not exactly easy to deal with either. As I've said, the list was an excellent one and they deserved to win all of their games. It's a shame that with GW's scoring system they missed out on the top three though!

Scoring system problems aside (I've talked about them plenty before), this has to be the best tournament we've played in. We enjoyed every single game and with the exception of a somewhat mis-matched first game the rest were incredibly close run, dramatic affairs which really pushed our tactics to the limit. 

I think the main reason we enjoyed it soo much was because we decided to use something fun for a change! June's list was brutally effective but wasn't exciting to play. Essentially we did a bit of movement then rolled dice until things died. This is my idea of a fun 40K game. With three units in our list that are brilliantly hit and miss we knew there'd be dramatic results. Whilst the brainleaf fronds result was really unlucky it had a profound effect on the game and was entertaining. I think it shows that the 6th edition rules that some are quick to ignore can really help to bring a bit of variety to even competitive games.

I'm hoping that GW continue to run at least some kind of doubles tournament as it's definitely the best way to play 40K if only for the fact that there's 4 of you round the table instead of 2. Thanks to all of our opponents this weekend for making it one to remember.

Now, I need to get painting my Dark Eldar for the small matter of Blog Wars 4!

Saturday, September 01, 2012

Dark Vengeance - First Impressions

Like a lot of people I got up this morning and headed straight to my FLGS to pick up my copies (yes I bought 2!) of Dark Vengeance. I was pleased to get both kits for £104 with a 20% discount. I've been looking forward to this for ages and I have to say I was not disappointed. Whilst the box wasn't as packed as some people were saying there's still loads of stuff in there. Having had quick flick through the A5 rulebook (which matches the page numbers of the big book), I went straight on to the models.

The first model I went for was the limited edition Interrogator Chaplain. Despite only being made of a few pieces it's an absolutely stunning model. I was particularly impressed with the sculpted base that was supplied with the miniature. The model's feet slot nicely into place and the rest of the assembly was a breeze. Personally I hope that the rest of the characters that are released for 6th edition are plastic and this detailed. The moulded base did make me wonder if this is something we'll see more of when the new kits arrive. Let's hope so anyway as I'm too lazy to make my own and too tight to buy resin bases for my whole army!

I've since assembled the rest of the models and each one was a dream to assemble. The models are incredibly detailed when you consider they're a) plastic and b) in a starter set! Now, I have to agree with others that it's a shame that there are duplicate models in the set but with some conversion work and varying paint jobs we can make them look individual. Frankly the amount of detail on each model quickly made me forget their were duplicates. When you look back to 2nd edition with the crappy mono-pose Space Marines and Orks.

Aside from the sculpted base for the Chaplain there are some really nice ideas here that I hope we see again. The terminators all come with a little trinket for their bases ranging from a pile of spent shells for the assault cannon to severed cultist heads on another terminator's base. This is a really nice touch and helps make your bases more interesting. The bikers are beautiful models and are leaning slightly to make them seem like they're moving quickly. This is where it's the biggest shame about duplicate models as you'd have thought they could make 3 different bikes. Mind you the way everything is packed onto the sprues it's a surprise they got in what they did.

It's a bit of a shame that the helbrute base is a basic flat round base but the model itself features some scenery underfoot to make it seem like a sculpted base. I'd have expected something more akin to a dreadnought base though. The cultists are nice miniatures considering they'll be mainly used as cannon fodder on the battlefield. I hope they don't end up being to costly in terms of points values though as that statline isn't too hot.

When you add up the miniatures on the GW website you're getting about £210 of models for £65 (or £52 in my case). Whilst there are duplicates I'd be pretty happy to field two of the tactical squads and with a small amount of converting I'll be using my further 3 bikes and 5 terminators. I wasn't really planning on starting a DA army from the DV box but the models are too good to pass up. I'm less excited about the Chaos ones and frankly I don't think I'll do Kranon and the Chosen justice with my meagre painting skills. That's something worth pointing out I think, the models are very detailed and someone who's new to the hobby and getting this as a way of getting into 40K might finding these a little daunting to paint. Don't get me wrong I'm not asking for simpler models but you see my point.


Putting the models aside the paperwork is decent too. I'm impressed that the mini rulebook is still full-colour and is essentially just a shrunk down version of the rules section of it's hardbacked older brother. I've yet to have a full read of the missions in the box but I'll try and give the solo ones a go over the weekend and then see if Matt or Jamie can be persuaded to give the other 4 a go. The mission book itself is nice with a basic guide to the rules in the front for new players and then some fluffy mission descriptions.


There's a couple of summary sheets in there too which for some reason are printed on different weights of paper but appear to be identical. The limited edition Chaplain model get's his own laminated reference sheet with assembly instructions on the back. All in all everything seems high quality and you feel like you're getting your money's worth.


I'm hoping that next month's White Dwarf has some painting guides as these are sadly absent from the box. I'm sure I can figure something out myself mind you but it's nice to have them as a bit of a clue! My main problem now is persuading myself to focus on painting my Dark Eldar army for Blog Wars 4 (tickets still available by the way) rather than getting distracted and painting my new shiny models.


All in all I'd have to say that this is the best starter set GW have produced. Griping about duplicate models seems a bit impotent when you consider how varied they are compared to early editions. Right time to go read the mission book and work out a paint scheme.


Tuesday, July 24, 2012

New Chaos Daemons Rules - from video

Can't take any credit for this but there's a video on YouTube of the new Chaos Daemons in the next White Dwarf. I imagine it will only be a matter of time before GW get's YouTube to take it down but try and catch it while you can. The commentary is in Dutch (as far as I can tell) but the magazine he's flicking through is thankfully in English. There's going to be a pull out booklet for Chaos Daemons to give them an official rules update for both Fantasy and 40K. I'm going to try and decipher as much of the video as possible to save people having to pause and do it themselves! Here goes (bear in mind it's a bit blurry in places so these are guesses at best!):

I have no idea about Fantasy but the interesting thing is that Soulgrinders can now be used!! Seems a strange move as I don't think they particularly fit with the rest of the models but whatever that's for the square-basers to worry about. No point me trying to comment on rule changes there because I wouldn't know the first thing about them!

Onto 40K, he only flicks through the rules quickly but basically there's a few units that have updated rules to go with their new models. There's new models for Plaguebearers, Nurglings, Screamers and Flamers. All of which look really nice. Matt now plays Daemons so I'm sure I'll have to face these things at some point. I'm considering a CSM army when they get released (now looking like Sept/Oct) so I'm keeping an eye on Daemons as potential allies (borrowing Matt's models!!).


There's a new Chariot of Slaanesh kit that seems to be a dual-kit that makes a (Exalted) Seeker Chariot or Hellflayers of Slaanesh. From what can be seen of the rules pages (video is a bit blurry at times) the standard chariot is 11,11,10 and 2 HP but the "exalted" version has 4 HP. Both seem to be piloted by an Exalted Alluress and will probably work in a similar way to a command barge in that it can only carry one model and is an Open Topped, Fast Chariot. However it says the driver can't get out of the Chariot and if the Chariot is destroyed they die too! The standard Chariot looks like it's 40 points with the Exalted Chariot at 90pts. Can just make out that the Exalted Chariot is a Herald and can take further upgrades. It looks like you take upto 3 chariots as a Heavy Support choice and can take any combination of the two types as a squadron.


The Hellflayer seems to be the same stats as the basic chariot and again carries an Exalted Alluress. Unfortunately the guy flicks the page too quick to read the rest of the rules!

Flamers are now two wound models and have an initiative boost to 4. There's also a new unit called a Pyrocaster which seems to be a squad leader of sorts and is a Character with an extra attack. Can't quite make it out but it looks like you pay 90 points for 3 (a bit cheaper than before - especially with 2 wounds!). The Pyrocaster is 5 pts and then you can buy additional flamers for what looks like 43pts each.

Also, it seems that screamers rules have been changed but unfortunately he never pans down to their entry.


As a final teaser the last page of the new WD seems to hint that next month's issue will contain CSM details as expected! Hope this was of some use to people. Obviously the WD isn't far away anyway! If you want to see pictures of the new models and the video itself check it out on Faeit 212.

LinkWithin

Related Posts Plugin for WordPress, Blogger...