
 Rumours of my demise have been greatly exaggerated! Well, let's face it. No one thought I was dead but it has been over 8 weeks since I last posted anything which is by far my longest dry spell. I'd love to tell you I've been working hard on my army and scenery projects but I haven't. I mostly blame the NFL but that's still no excuse for the fact that a dreadnought I started painting in early October still hasn't got three colours on it even! Anyway, depressing lack of hobby progress aside, I have some exciting DIY activities to report.
You may remember that I was planning on converting the back of my garage into a hobby space. My current gaming room will eventually become my son's proper bedroom when he moves out of the nursery so I'm being relegated to the garage. I'm not content with simply playing on the concrete floor with a heater trying to stave off frostbite! My Dad and I therefore set about converting the back of the garage into a proper room.
The idea is that from the front the garage will look unchanged. Particularly important for a) resale and b) hiding the fact that there's stuff in there. To decide how much space I had I simply opened up the garage door and decided to put up a partition wall just inside the point the door opened to. This will give me a few square metres of "garage" at the front for the lawn mower, bike, tools, etc. That leaves me a 3.5 x 2.5 m (ish) gaming and hobby space. Enough to get a 6' x 4' table in and just about be able to squeeze round it. Four people playing doubles every so often would be cosy but two should be fine. Thing is, I don't want a permanent table like I've currently got in my gaming room. It (obviously) takes up a big chunk of space and means the room can't be used for anything else. My Dad and I have come up with a cunning plan for this but I'll post some sketches up at some point to better explain it.
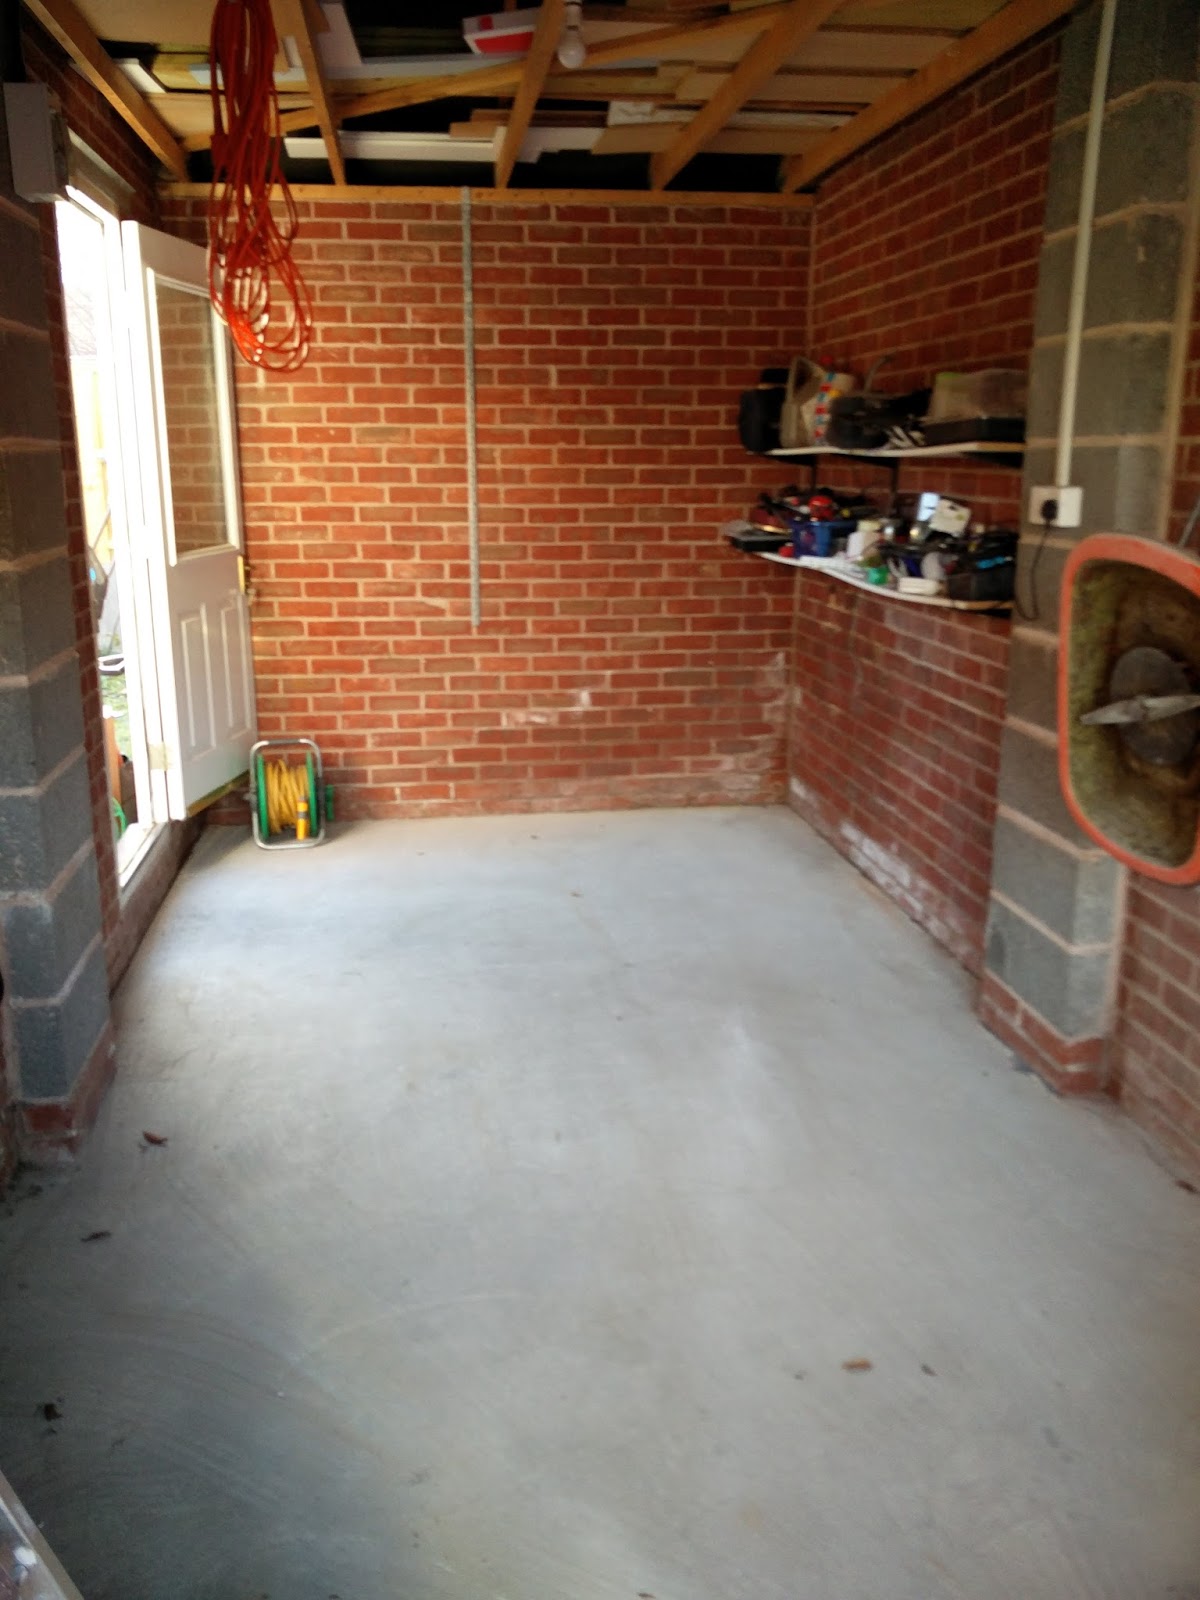
For now, let's take a look at my progress so far. As you can see from the picture above, I had a big pile of timber delivered last week so that we could get cracking on Saturday. Here's what the garage looked like to begin with.

As you can see there's plenty of crap in there but hopefully I'll get most of it cleared out soon. As a temporary measure we chucked everything outside to let us do the floor. With it all swept out it looked like this:
We started out with some plastic sheeting to prevent damp from rising up. Then we laid some 25 mm insulation around the edges. On top of this we placed some 4" x 2" timbers width ways:

We then screwed some more "four-be-twos" on top of this to create some joists for the flooring:

To make things cosy we put 4 inches of insulation between the joists:

We then screwed down some 18 mm plywood to create the floor. Looks pretty neat I think:

So this will be the room in the back of the garage. Doesn't look particularly big in the photos. Frankly, it isn't but it's about the same as I have now and I've managed with that for a few years now.
We then screwed another timber across the end of the floor and a further one to the roof trusses. Two more were screwed into the brickwork to create a frame. We then put some vertical timbers at 400 mm intervals to which we'll screw some plasterboard to create the partition wall:

As you can see, at this point we brought a lot of the crap back in because it had started to rain. Pretty pleased with this for a day's work anyway.

So, next up I need to take the vast majority of the crap out of the garage and to the local tip. What's staying needs to be organised into the residual bit of garage at the front. I'm then going to get some quotes for Velux windows on the back of the roof. Be good to have some natural light in there for painting.
Between now and the next time my Dad is over we'll have had all of the plasterboard delivered so we can start to make the walls but not before we've sorted all the electrics out. What do you think so far anyway?
Great idea. My garage is just an extension of the loft, filled with all the stuff we can't fit in there. I do have a bench for the more messy/smelly hobbying I do. Looking forward to seeing this all done. Love seeing the transformation of spaces into hobby awesomness
ReplyDeleteBrilliant work so far. You'll need to waterproof the bottom of the door if your driveway slopes towards the door and there is a drain? Maybe also think about ventilation if you are going to breath a lot in there? The moisture you breathe out builds up over time. If you put in a strengthening lateral joist across the roof struts to load bear, you can then plank out some of the roof void to store garage type stuff above you. They are not load bearing at present.
ReplyDeleteGreat work - you're off to a flying start. Like Siph says, ventilation will be key, something like a bathroom extractor fan, or just a ventilation brick or similar will help immensely with avoiding damp problems.
ReplyDeleteAre you planning on having a door to access the garage part of the garage as well? Might make popping in and out to do the messy bits of the hobby a lot easier.
You'll have a top hobby spot before you know it.
Looks great! It never feels right to me unless you are playing in a snug space anyway haha. With us looking to buy our first house soon this is something in the back of my mind at the moment. Obviously I wouldn't try and influence my better half on a certain choice of abode just ao there was good gaming space. Probably not anyway lol
ReplyDeleteGood job Alex :)
ReplyDelete